PacketVis offers an easy-to-use BGP and RPKI monitoring service. One of the features we believe to be fundamental is the possibility to integrate such monitoring into systems that network operators may already have in place. For this reason, we provide a convenient REST API from which you can get the overall health status of your BGP and RPKI operations.
Note: PacketVis supports many integrations, including email, Telegram, Slack, PagerDuty, Syslog, and many more.
In this article we will see how to integrate PacketVis with any monitoring solutions based on API polling. Some famous solutions that support API polling are Nagios and checkmk.
Prerequisites
-
You already have your monitoring up and running with PacketVis. If you don’t, start monitoring now.
-
You have a valid API key to access PacketVis’ APIs. To generate a new API key go here.
Accessing the API
To simplify the access to our API, we created a page that will guide you through the various parameters available.

Open this page and select which organization you want to access (you may be part of multiple organizations), and which API key to use. Ignore for now the Minimum severity field, which will be explained later.
While you make your selections, the gray box below will show you the URL that you can use to access the API.
A quick look to the API format
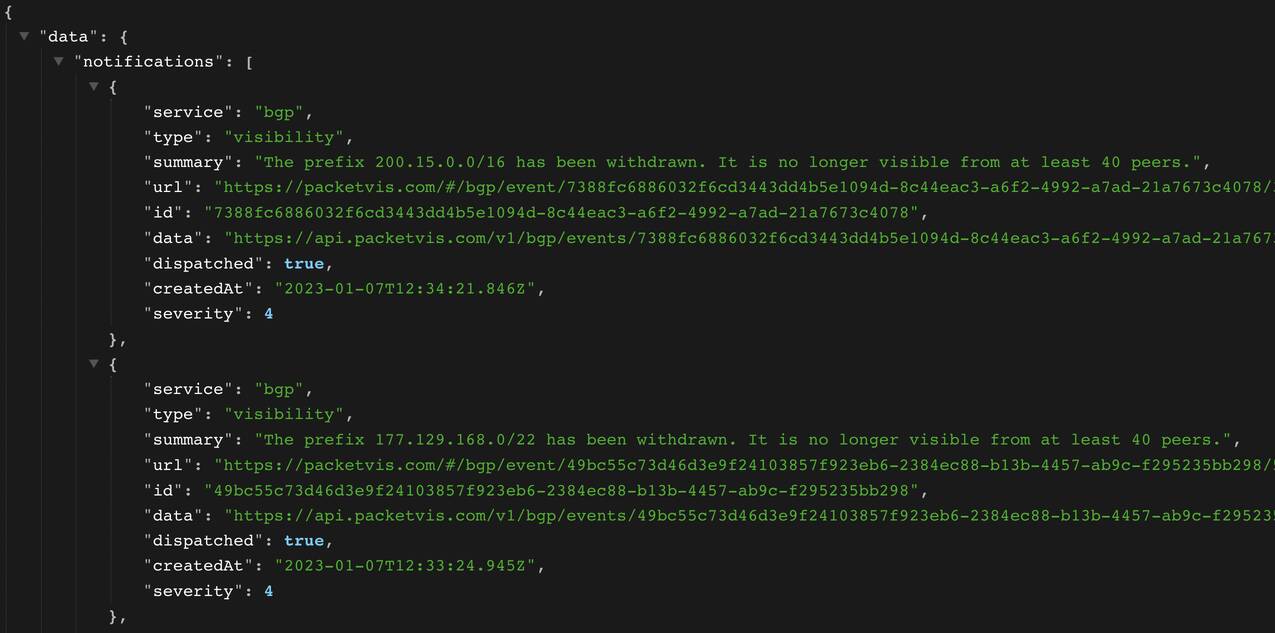
The API provides a list of notifications and a warning attribute.
1
2
3
4
5
6
7
8
9
10
11
12
13
14
15
16
17
18
19
20
21
22
23
24
25
26
27
28
29
30
31
32
33
{
  "data": {
    "notifications": [
      {
        "service": "bgp",
        "type": "visibility",
        "summary": "The prefix 200.15.0.0/16 has been withdrawn. It is no longer visible from at least 40 peers.",
        "url": "https://packetvis.com/bgp/event/7388fc6886032f6cd3443dd4b5e1094d-8c44eac3-a6f2-4992-a7ad-21a7673c4078/3c6952e8743de22ce816244867f82e478fba72c0",
        "id": "7388fc6886032f6cd3443dd4b5e1094d-8c44eac3-a6f2-4992-a7ad-21a7673c4078",
        "data": "https://api.packetvis.com/v1/bgp/events/7388fc6886032f6cd3443dd4b5e1094d-8c44eac3-a6f2-4992-a7ad-21a7673c4078/3c6952e8743de22ce816244867f82e478fba72c0/data",
        "dispatched": true,
        "createdAt": "2023-01-07T12:34:21.846Z",
        "severity": 4
      },
      {
        "service": "bgp",
        "type": "visibility",
        "summary": "The prefix 177.129.168.0/22 has been withdrawn. It is no longer visible from at least 40 peers.",
        "url": "https://packetvis.com/bgp/event/49bc55c73d46d3e9f24103857f923eb6-2384ec88-b13b-4457-ab9c-f295235bb298/56f53d03c757c2bc77d97822c8c775dcd85ddb12",
        "id": "49bc55c73d46d3e9f24103857f923eb6-2384ec88-b13b-4457-ab9c-f295235bb298",
        "data": "https://api.packetvis.com/v1/bgp/events/49bc55c73d46d3e9f24103857f923eb6-2384ec88-b13b-4457-ab9c-f295235bb298/56f53d03c757c2bc77d97822c8c775dcd85ddb12/data",
        "dispatched": true,
        "createdAt": "2023-01-07T12:33:24.945Z",
        "severity": 4
      }
    ],
    "warning": false
  },
  "metadata": {
    "useStatusCode": false,
    "warningMinutes": 10
  }
}
Each notification contains various attributes, the most important are:
type- the type of the notificationsummary- the summary of the notificationurl- the URL to access the page of the notification (UI)createdAt- the date-time when the notification was issuedseverity- the severity of the notification (it can be configured)data- the URL to access the collection of BGP updates that triggered the notification (another API)
The warning attribute will have a true value if there is a recent notification respecting your filtering criteria. This attribute is really important since it is the one that you will need to check to know if everything is ok. However, there is also an easier way, which will be explained later on :)
Filtering the notifications
You may be interested in integrating with your system only specific notifications generated by PacketVis. For example, imagine you are already receiving by email all the notifications, and you want to integrate in nagios just some notification types you deem more important.
Filter by severity
In PacketVis, you can assign a severity to each type of notification (directly in the page of the notification). You can use it in the REST API to filter the notifications. To do that, just change the severity parameter in the URL with one of the values below:
1(low) for receiving all notifications2(medium) for receiving medium, high and critical severity notifications3(high) for receiving high and critical severity notifications4(critical) for receiving only critical notifications
For example, the URL below allows you to receive only critical notifications
https://api.packetvis.com/v1/notifications/organizations/1?key=...&severity=4
Filter by notification type
You can be even more specific and just receive only certain types of notifications. To do this, you can provide a comma-separated list of types with the parameter types.
Valid types are: hijack, visibility, misconfiguration, newprefix, neighbors, rpki-invalid, rpki-disappear, rpki-unknown, ta-expire, ta-malfunction, roa-diff, roa-expire.
For example, the URL below allows you to receive only hijack and rpk-invalid notifications
https://api.packetvis.com/v1/notifications/organizations/1?key=..&types=hijack,rpki-invalid
The warning attribute
The API will always show you a list of notifications, independently of when these notifications were generated. Looking if there are notifications in the list is not an indication of the current health status of your network.
Instead, the warning attribute is what determines the current health status of your network. After a warning is triggered, you can go to the PacketVis dashboard to see what is going on.
By default, warning will be true if there was a notification triggered the last 10 minutes. You can tune this by setting a different amount of minutes with the warning parameter in the URL.
For example, the URL below will report warning: true if there was a critical notification in the last 15 minutes
https://api.packetvis.com/v1/notifications/organizations/1?key=...&severty=4&warning=15
You can read the JSON payload in nagios and checkmk by using the check_http plugin. An example for checkmk can be found here. However, how annoying is to read the JSON payload? We got you covered!
You can set the parameter status to true in the URL to receive an HTTP 418 status code every time there is a warning in the payload.
For example, the URL below will fail with HTTP 418 error if there was a critical notification in the last 15 minutes
https://api.packetvis.com/v1/notifications/organizations/1?key=...&severty=4&warning=15&status=true
This will not change the returned payload. However, the call will be considered failed by whatever polling mechanism you are using, without the need to parse the returned JSON.
I’m a teapot! We use the 418 error (rfc2324) because it is an error code unlikely to be generated by any malfunctioning of the API. E.g., a 502 error may indicate that the API itself is not functioning, instead of the monitored network. However, our APIs are redundant, and we do our best for this to never happen.
We suggest you a polling time greater or equal to 2 minutes. For anything more real time we suggest you to use another of the integrations available.
Enjoy!